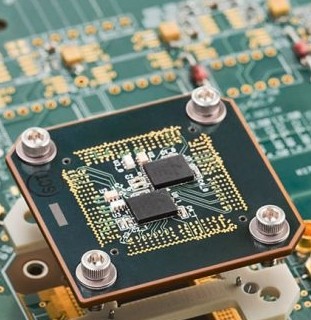
 To protect your probe card investment, prevent probing errors and avoid device damage, we’ve outlined the following cleaning regimen for the off-line cleaning of your Pyramid Probe® Card.
STEP 1: INSPECTING THE CORE
- Inspect the core under the microscope. Look for any damage and/or loose particles.
- If loose particles are found, follow the next steps. If no loose particles are found, go directly to step 2.
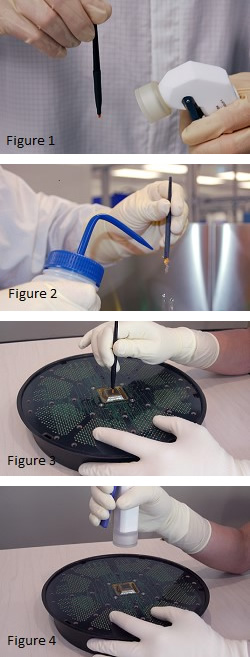
- Use an acceptable air nozzle with a maximum of 40 psi (275 kPa) air-nozzle pressure on Pyramid Probe cores (see Fig. 4).
- Hold it perpendicular to the probe card face, 3 inches (75 mm) from the probe tips (see Fig. 4).
- Before approaching the core with the air nozzle, activate the air stream (air nozzle will tend to move forward even at low pressure).
STEP 2: PREPARING THE CLEANING BRUSH
- Aim the air nozzle away from the microscope and work area.
- Blow out any debris in the brush bristles (see Fig. 1).
- Using a squeeze bottle of IPA or methanol, wet brush (see Fig. 2), then blow off brush bristles again (see Fig. 1).
STEP 3: CLEANING WITH BRUSH
- Wet the brush again with IPA or methanol.
- Hold the brush perpendicular to the probe card face (see Fig. 3).
- Start cleaning from either the left or right side of the probe card face (see Fig. 3).
- Using circular motion, clean across the face and back again. Use enough force with brush to feel the probe tips. (if IPA/methanol begins to dry, apply more to brush only. Do not allow brush to dry out during this step).
- Clean the brush again, according to Step 2, and wet the brush again with alcohol.
- Using smooth brushstrokes, wipe the probe face from edge to edge. DO NOT use a back and forth motion. Repeat from top to bottom, to wipe particles from entire face.
STEP 4: BLOW AWAY PARTICLES AND SOLVENT
- Use an acceptable air nozzle (see Fig. 4).
- Hold air nozzle vertical to the probe face, 3 inches (75 mm) from the core (see Fig. 4).
- Before approaching the core to use the air nozzle, activate the air stream (this is because the air nozzle will tend to move forward even at low pressure).
- Continue blowing until the face is visibly dry, approximately 30-60 seconds.
- Inspect and repeat steps 1 through 4, until clean.
If you need assistance, please contact a probe card expert, who can help guide you through the process. For a more detailed explanation, refer to the Quick Reference Guide [PDF] available on our website. We’ll be blogging soon about online probe card cleaning methods so stay tuned.


 To protect your probe card investment, prevent probing errors and avoid device damage, we’ve outlined the following cleaning regimen for the off-line cleaning of your Pyramid Probe® Card.